The Ultimate Guide: How to Install Fonts on Mac for Professional Design and Personalization to Enhance Your Digital Workflow and Creative Output

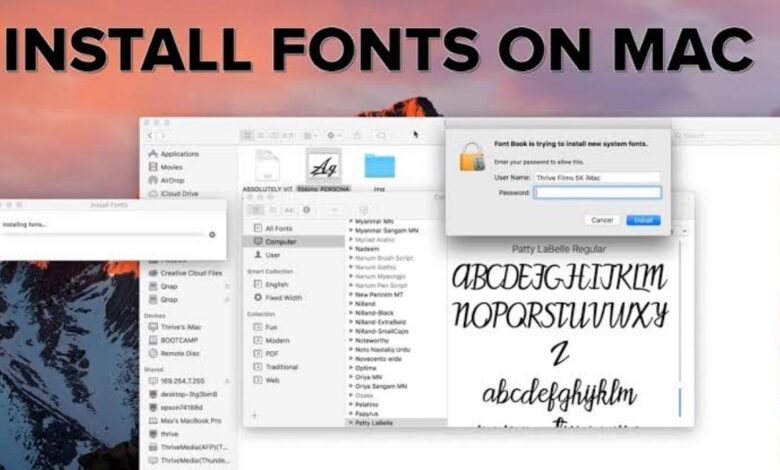
If you are looking to elevate your design projects, learning how to install fonts on Mac is a fundamental skill that every creative professional should master. Typography plays a massive role in visual communication, and having a custom library at your fingertips allows you to bring unique personality to your documents, websites, and creative illustrations. While macOS comes with a robust set of pre-installed typefaces, adding your own is a straightforward process thanks to the built-in Font Book application. This comprehensive guide will walk you through everything you need to know to successfully expand your typography toolkit and manage your collection with ease.
| Feature | Details |
| Primary Task | Efficiently install fonts on Mac |
| Main Utility | Apple Font Book Application |
| Common Formats | .otf (OpenType) and .ttf (TrueType) |
| Key Location | ~/Library/Fonts/ (User) or /Library/Fonts/ (System) |
| Requirement | Validated files for stable performance |
The Role of Typography in Modern Digital Design
Typography is more than just selecting letters on a screen; it is about setting the mood and readability of your content. When you install fonts on Mac, you gain the ability to choose typefaces that perfectly align with your brand identity or artistic vision. Whether you are working on a presentation, a graphic design project, or a personal manuscript, the right font choices can drastically improve the aesthetic appeal and professional quality of your work. By curating a personalized library, you ensure that you always have the perfect set of tools to communicate your message effectively across any digital medium.
Understanding the Apple Font Book Application
The central hub for managing your typography on macOS is the Font Book app. This powerful utility allows you to preview, validate, and install fonts on Mac systems without needing third-party software. Font Book acts as a gateway for your system to recognize new typefaces, ensuring they appear correctly in your favorite applications like Keynote, Pages, or Photoshop. By familiarizing yourself with this interface, you can effortlessly organize your growing library into custom collections, deactivate unused typefaces to keep your system fast, and resolve any conflicts that might occur when multiple versions of the same file are present.
Locating and Downloading Quality Font Files
Before you can install fonts on Mac, you must source the files from reliable providers. Whether you are downloading from popular platforms like Google Fonts or dedicated type foundries, ensure the files are in recognized formats like OpenType (.otf) or TrueType (.ttf). Always avoid downloading files from suspicious sources to protect your system from potential malware. Once you have your compressed files, double-click the .zip folder in Finder to extract the actual font files. Only these extracted files, not the archive folders, are ready to be integrated into your macOS environment for active use.
Using the Drag-and-Drop Method for Quick Installation
The fastest and most intuitive way to install fonts on Mac is by using the drag-and-drop method. Simply open the Font Book application, and then drag your extracted font files directly into the main window. This action triggers a validation process where macOS checks the files for errors or corruption. If the files are valid, they will be added to your library almost instantly. This method is incredibly useful if you have a large batch of files to add, as it allows you to process multiple items in a single, smooth workflow, saving you significant time and effort.
Installing via the File Menu in Font Book
If you prefer a more formal approach, you can install fonts on Mac using the File menu commands. Within the Font Book app, select “File” from the top menu bar, then choose “Add Fonts to Current User.” A file browser window will appear, allowing you to navigate to your specific files. Select the ones you wish to add and click “Open.” This process provides a bit more control and ensures that you are intentionally placing files into your local directory. It is a reliable method that avoids accidental drops and gives you a clear view of your directory structure.
Double-Clicking Files for Instant Preview and Setup
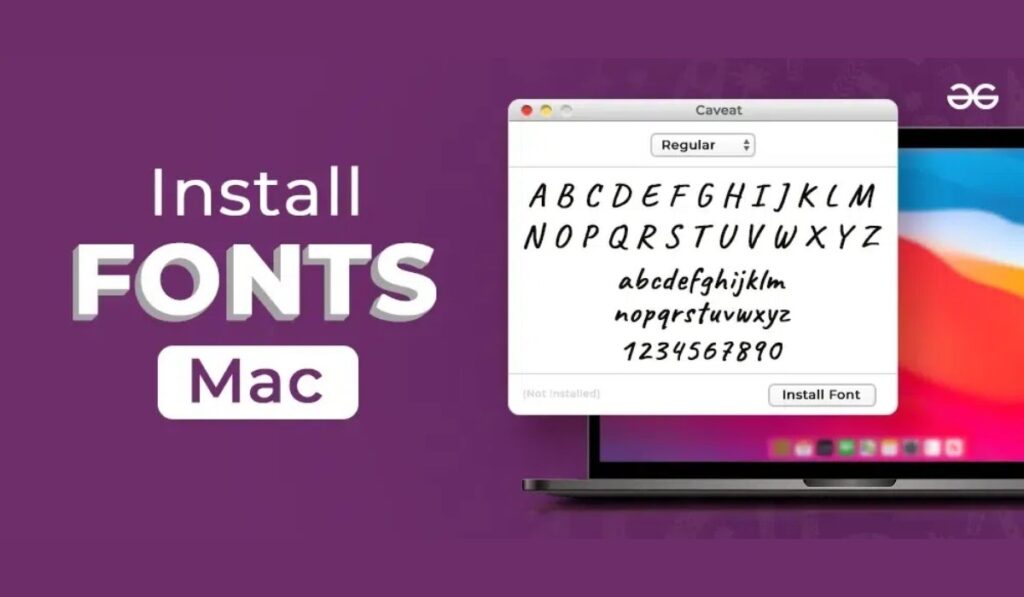
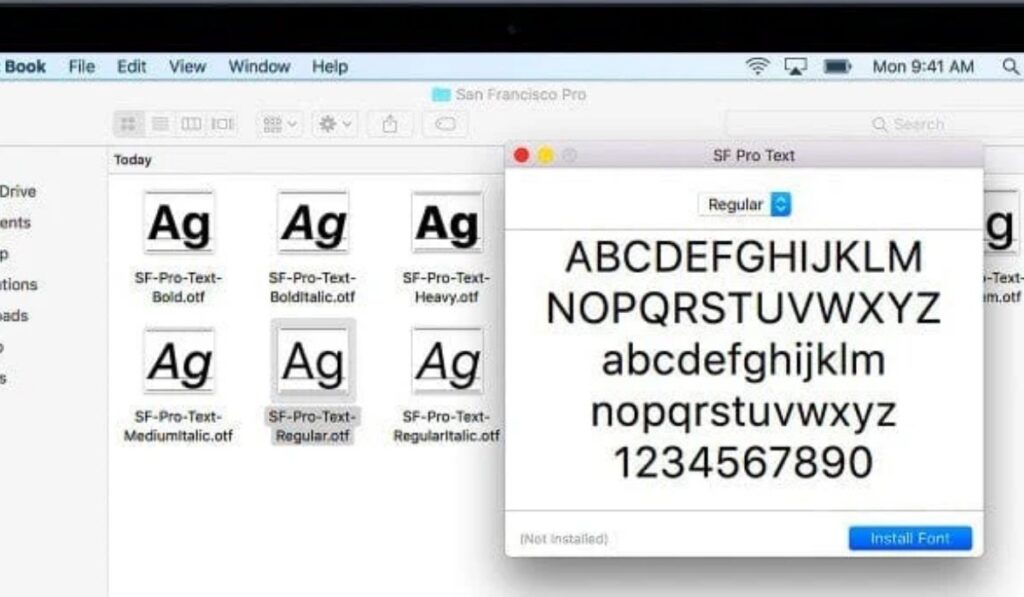
Another very simple technique to install fonts on Mac is to use the Finder itself. Simply double-click on any supported file (like an .otf or .ttf file), and macOS will automatically open a preview window. This preview shows you how the typeface looks in different sizes and weights. At the bottom of this window, you will see an “Install” button. Clicking this triggers the installation process immediately. This is particularly helpful when you only want to add a single file and want to verify its appearance before committing it to your system library for future use.
Understanding User Versus System-Wide Installation
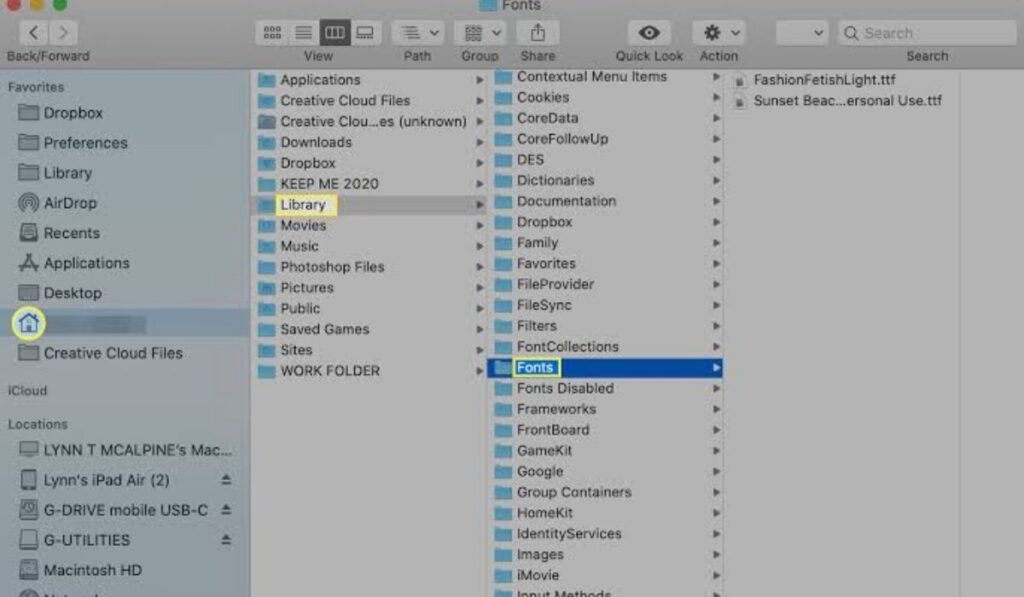
When you install fonts on Mac, it is important to know where they are saved. If you install them for the “Current User,” they are placed in your home Library folder (~/Library/Fonts/) and are only visible to your specific account. If you choose to install them for “All Users,” they go into the System Library (/Library/Fonts/), making them available to anyone who logs into the computer. For most personal users, the “Current User” location is sufficient and safer, as it keeps your modifications isolated and prevents unauthorized changes to system-wide files that could affect performance.
Validating Your Files to Prevent System Issues
Before you install fonts on Mac, Font Book automatically runs a validation check. This step is crucial because corrupted or poorly coded files can cause apps to crash or documents to fail to open. If you see a green checkmark, your files are healthy and safe to use. If you see a yellow warning, there might be minor issues, while a red icon indicates a critical failure. Always pay attention to these warnings. If a file fails validation, it is best to remove it and find a higher-quality version to maintain the stability of your operating system.
Managing Your Library with Custom Collections
A well-organized library is essential for productivity. Once you install fonts on Mac, you should use collections to keep them sorted. In Font Book, you can create new collections by clicking the “Plus” button. Think of these as folders for your projects—for example, you might create a “Corporate” collection for professional work or a “Handwritten” collection for creative tasks. Grouping your typefaces makes them significantly easier to find when you are deep in a design project. Instead of scrolling through hundreds of options, you can jump straight to the relevant category and pick the perfect look.
Deactivating Unused Files to Improve Performance
If you have a massive library, it can sometimes slow down application startup times. If you rarely use certain ones, you can install fonts on Mac and then simply deactivate them later. Within Font Book, select the items you don’t need, go to the “Edit” menu, and choose “Deactivate.” This keeps the files on your hard drive but prevents them from loading into your system’s active memory. If you ever need them again, you can easily toggle them back on. This is a great way to keep your system lean while still maintaining a massive archive of assets.
Resolving Duplicate Conflicts Effectively
Sometimes you may try to install fonts on Mac that are already present in your system, leading to duplicate conflicts. Font Book is smart enough to detect these issues automatically. When a duplicate is found, the app will notify you and usually ask which version you would like to keep. It is generally recommended to keep the newer or “enabled” version to ensure you are using the best-maintained file. Resolving these duplicates prevents unexpected text rendering issues and keeps your font menu clean, ensuring you don’t see the same name appearing multiple times in your design apps.
Cleaning Up Your System Library Folders
If you prefer a manual approach, you can install fonts on Mac by dropping files directly into the hidden Library folders. To access these, use the Finder’s “Go” menu and hold the “Option” key to reveal the “Library” option. From there, navigate to “Fonts.” Manually dragging files into this folder effectively adds them to your account. While this is not as visual as using Font Book, it is a powerful way to manage your files in bulk if you are comfortable with the file system. Just remember that files placed here might not be automatically validated by the OS.
Using Third-Party Managers for Advanced Control
While Font Book is excellent for basic tasks, professional designers often need more power. If you find yourself needing to install fonts on Mac in huge quantities, consider third-party managers like Typeface or Suitcase Fusion. These apps offer better previews, more robust tagging, and advanced activation features that can handle thousands of items without cluttering your system. For most users, Font Book is more than enough, but as your professional needs grow, exploring these specialized tools can significantly streamline your workflow, especially when you are managing heavy design projects that require constantly changing your active library.
Troubleshooting Common Installation Errors
If you are struggling to install fonts on Mac, start by checking if the file format is supported. macOS natively supports OpenType, TrueType, and various collections. If you are trying to use a legacy format like PostScript Type 1, you may encounter issues. If a newly added file doesn’t show up in your apps, the most common fix is to save your work and restart the application, or even your entire Mac. Clearing the font cache can also solve stubborn display issues, though this is an advanced step that should only be taken if basic troubleshooting fails to resolve the problem.
Optimizing Your Creative Workflow with Smart Collections
Smart Collections are a fantastic feature in Font Book that helps you install fonts on Mac and keep them organized with zero effort. You can set up rules based on attributes like family name, style, or language. For instance, you can create a “Smart Collection” that automatically gathers every “Sans Serif” style you add to your system. As you add new ones in the future, they will automatically appear in this list if they match your criteria. This saves you from having to manually categorize every single item, ensuring your library stays perfectly organized as it grows.
Best Practices for Choosing Typeface Variations
When you install fonts on Mac, you will often notice that a single family includes many variations like “Bold,” “Italic,” “Light,” and “Condensed.” It is usually best to install the entire family rather than just one style. This gives you more flexibility when designing layouts, allowing you to use different weights for hierarchy and emphasis. If you only install the basic version, you may find your design software creates a “fake” bold or italic, which often looks poor. Installing the complete family ensures high-quality rendering and maintains the integrity of the design as the original creator intended.
Managing Resources on Older Hardware
If you are working on an older Mac, be mindful of how many files you have active. While you can certainly install fonts on Mac without limit, having thousands of active files can consume system resources and slow down your machine. Use the “Deactivate” feature in Font Book to keep your active list small. Only keep the typefaces you are currently using for your active projects. This simple habit keeps your Mac running fast and ensures that your creative software remains responsive, even if your hardware is a few years older and has less processing power.
Maintaining Consistency Across Your Projects
Once you decide to install fonts on Mac, try to maintain a consistent set of assets for your brand or ongoing projects. If you frequently jump between different machines, keep your source files in a synced cloud folder. This ensures that whenever you set up a new environment, you can quickly install fonts on Mac and get back to work without missing any elements of your design. Consistency in your typography is key to professional results, and having your core library readily available is the best way to ensure your projects always look cohesive and polished.
Exploring Creative Sources for New Designs
The internet is full of incredible resources for finding new typefaces. Sites like Google Fonts, DaFont, and various independent foundries are great places to browse. When you find one you love, just download and install fonts on Mac using the steps mentioned above. Remember to check the licensing details; many are free for personal use but require a commercial license for professional projects. Being mindful of these legalities is an important part of being a professional designer and ensures you are respecting the hard work of the creators who provide these beautiful design assets.
Final Thoughts on Mastering Your Typography
Learning how to install fonts on Mac is a simple yet transformative process that opens up endless creative possibilities. By taking control of your typography, you are not just adding files to a folder; you are curating the voice and personality of your digital output. With the tools and methods covered in this guide, you can now confidently expand your library, manage your collections, and troubleshoot any issues that arise. Start building your perfect collection today and watch how it elevates your designs to a whole new level of professional polish and aesthetic beauty that stands out from the crowd.
- Is it safe to install files from the internet?
- Yes, but only download from reputable sources like Google Fonts or known foundries to ensure the files are free of malware.
- Why don’t my new files appear in my apps?
- If you have already performed an installation, try restarting your design application or your computer to refresh the system’s font cache.
- Can I remove them if I change my mind?
- Yes, simply open Font Book, select the item you want to remove, and choose “File > Remove” to delete it from your Mac.
- Do I need to be an admin to add them?
- No, you can install them for your “Current User” without administrative privileges, though system-wide changes do require an admin password.
- What are the best formats to use?
- OpenType (.otf) and TrueType (.ttf) are the standard formats and offer the best compatibility and performance on macOS systems.