The Complete Professional Guide: How to Install Gutters Successfully to Protect Your Home and Foundation from Water Damage and Potential Long-Term Structural Decay

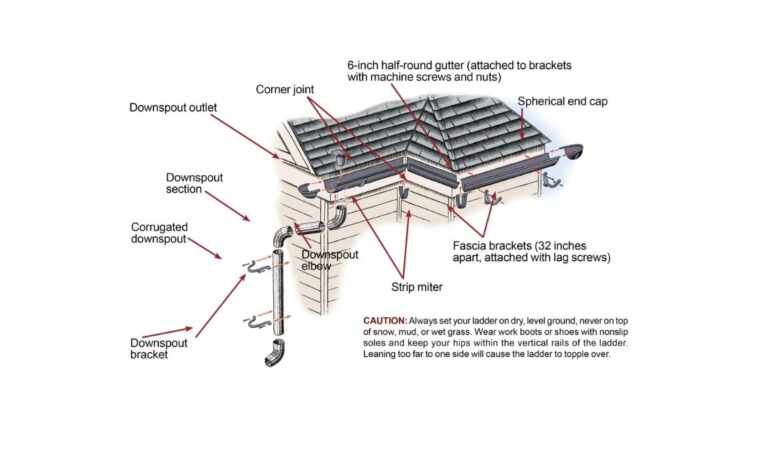
Effective water management is the fundamental cornerstone of a healthy, long-lasting home. When you install gutters correctly, you create a vital protective shield that directs heavy rainfall away from your roof, siding, and home foundation. Without this essential system, water cascades directly off your eaves, pooling dangerously around the base of your house and potentially causing expensive issues like wood rot, soil erosion, and basement flooding. Whether you are a dedicated DIY enthusiast or a homeowner looking to better understand the process, mastering the art of exterior drainage is a rewarding project that preserves both the aesthetic beauty and the physical integrity of your property.
| Feature | Details |
| Primary Goal | Efficiently install gutters to manage water flow |
| Key Benefit | Prevents foundation damage and roof rot |
| Slope Standard | 1/4 inch drop per 10 feet of length |
| Essential Tool | Reliable level and chalk line |
| Safety First | Always use a ladder stabilizer and gloves |
Understanding the Importance of Your Drainage System
The primary reason to install gutters is to control the immense volume of water that hits your roof during a storm. A roof without proper channels allows water to soak into the ground near your foundation, which can lead to cracks and eventual structural instability. By installing a robust system, you ensure that rainwater is captured and whisked away to a safe distance from your exterior walls. This proactive step helps maintain the structural health of your home, prevents basement leaks, and protects your landscaping from the destructive force of uncontrolled runoff during heavy seasonal rain events.
Assessing Your Home’s Specific Gutter Requirements
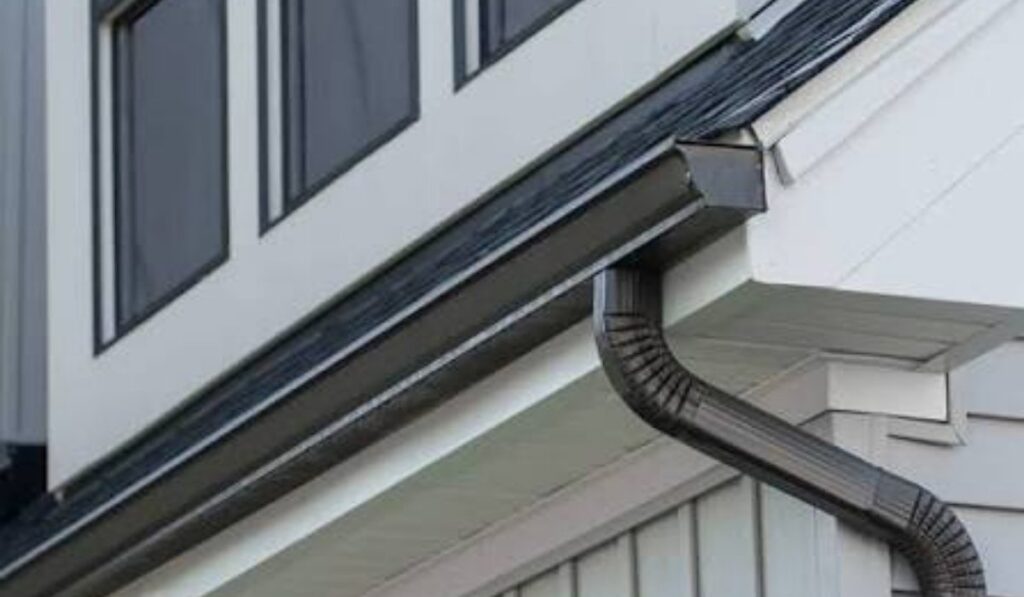
Before you begin, evaluate the layout of your roofline to see where you need to install gutters. Measure the total length of the fascia boards to determine how much material you need. Consider the number of corners, downspouts, and outlets required for a complete system. If your roof has complex angles or multiple levels, you may need additional connectors. Planning your layout on paper first will help you visualize the flow and ensure you don’t miss any crucial components like end caps, brackets, or hangers. Proper planning is the foundation of a successful and efficient installation project.
Essential Safety Equipment for Installation
You cannot install gutters safely without the right protective gear. A sturdy extension ladder is necessary, but it must be paired with a ladder stabilizer to prevent damage to the existing gutters or fascia. Always wear thick, non-slip gloves to protect your hands from sharp metal edges, and put on safety glasses to shield your eyes from debris. If you are working on a tall home, consider using a harness or having a spotter to hold the ladder. Your safety is paramount, so never rush the process or compromise on stability when working at significant heights.
Gathering the Necessary Tools for Success
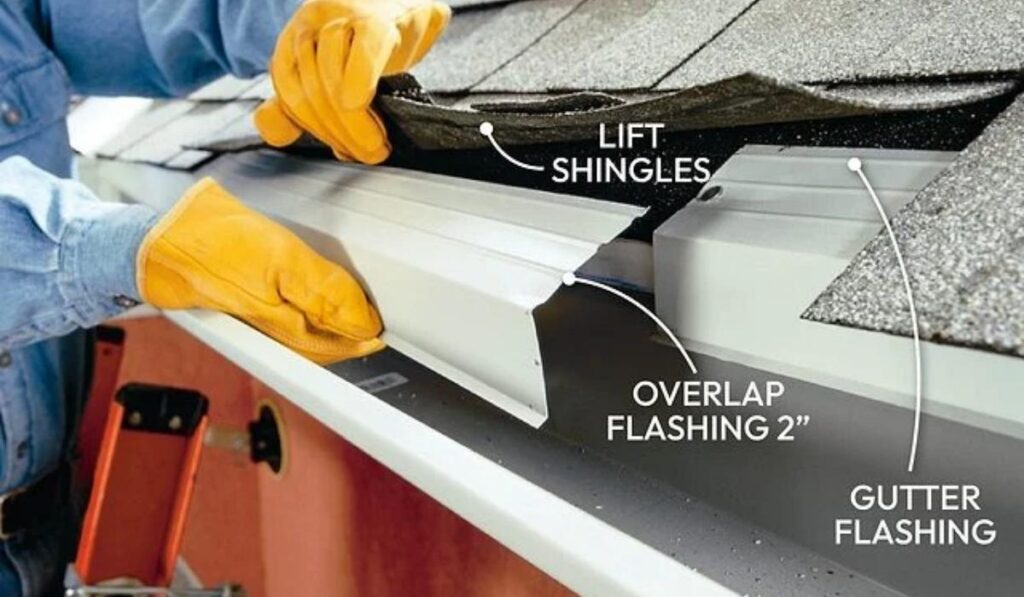
To install gutters like a professional, you need a specific set of tools. Key items include a cordless drill for driving screws, a tape measure for precise dimensions, and a chalk line to mark your slope. You will also need aviation snips or a hacksaw for cutting metal sections to the correct length. A torpedo level is indispensable for verifying that your slope is set correctly for optimal drainage. Finally, keep a caulking gun with high-quality sealant on hand to ensure every joint and connection is completely watertight, preventing leaks before they can even start to form.
Removing Your Old or Damaged Gutter System
If you are replacing an outdated system, you must first remove the old one. When you install gutters as a replacement, ensure the old material is disposed of safely. PVCu gutters are usually lightweight, but older cast-iron or heavy metal systems may require assistance to dismantle. Check the fascia board underneath for any signs of water damage or rot while the old hardware is removed. If you find damaged wood, repair it now before you proceed with the new installation, as a solid, rot-free mounting surface is critical for the long-term stability of your new system.
Marking the Outlet and Downspout Locations
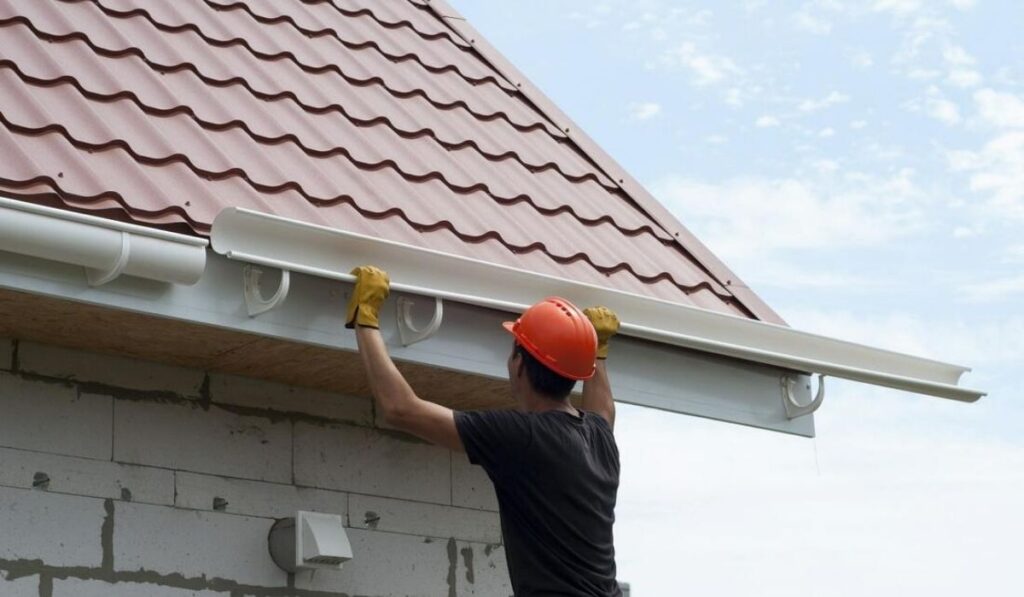
Precision is key when you install gutters. Start by marking the location of the running outlet, which guides the water from the gutter into the downpipe. Use a plumb bob to ensure the outlet aligns perfectly with the drainage point below. The position of the outlet determines the direction of the slope, as all water must flow toward this point. Take your time with these measurements, as even a small error here can result in poor drainage later. Clear marks on the fascia board will serve as your guide throughout the rest of the installation process for each section.
Calculating the Correct Gutter Slope for Drainage
One of the most critical steps to install gutters effectively is setting the pitch. A standard rule of thumb is a 1/4 inch drop for every 10 feet of length. This slight incline ensures that water flows consistently toward your downspouts rather than pooling in the center. Use a chalk line to snap a straight, angled guide between your high point and your low point. If your run is particularly long, you may need multiple downspouts to maintain a manageable slope. Double-check your pitch with a level before securing the hangers to guarantee efficient water removal.
Installing Brackets Along the Fascia Board
Hangers are the backbone of your system. When you install gutters, space your brackets according to the manufacturer’s instructions—usually every 24 inches for standard weight or closer if you live in an area with heavy snow. Ensure the brackets are aligned with the chalk line you snapped earlier. Use high-quality, weather-resistant screws to attach them securely to the rafter tails or fascia board. If the mounting surface is not solid, the gutters may sag under the weight of water or ice. Firm, correctly spaced brackets are essential for keeping the system level and leak-free.
Cutting and Fitting Your Gutter Sections
Once your brackets are in place, you are ready to install gutters by fitting the sections. Measure each piece carefully against the fascia, then use your tin snips or hacksaw to cut the metal to size. After cutting, deburr the edges with a file or sandpaper to prevent sharp points from causing injury or damaging other components. Carefully lift the section and snap it into the hangers. If you are joining two pieces together, use a union bracket and ensure the overlapping edges are properly sealed with high-quality silicone caulk to prevent any leaks at the seams.
Sealing Joints and End Caps Properly
Even the best-installed system will leak if the joints are not sealed. When you install gutters, apply a generous bead of high-quality gutter sealant inside every connector, end cap, and mitered corner. Smooth the sealant with a finger or a small tool to create a clean, watertight seal. Do not rely solely on the mechanical connection of the brackets. The sealant provides the final barrier against water ingress. Allow the sealant to cure completely according to the manufacturer’s instructions before testing the system with water, ensuring that everything is ready to perform during the next heavy storm.
Attaching the Downspout System Correctly
The downspout is where the water finally leaves your home. As you install gutters, complete the process by adding these vertical pipes. Use offset bends to guide the downpipe from the outlet back toward the exterior wall. Secure the downspout to the house using mounting straps or clips every few feet to ensure it remains stable. The bottom of the downspout should have an elbow directing water at least 4 to 6 feet away from the foundation. Installing a splash block or underground drain pipe at the base further protects your soil from erosion and foundation issues.
Testing Your New Gutter System for Leaks
After everything is secured, you must verify your work. Use a garden hose to run water into the upper end of the gutter and observe the flow. When you install gutters, this “water test” is the only way to be 100% sure that your pitch is correct and that your joints are sealed. Watch for any water dripping from the seams or sagging sections where water might pool. If you find a leak, dry the area completely and add more sealant. A successful test run confirms that your home is finally protected against the elements.
Maintaining Your Gutters for Long-Term Performance
Installation is just the beginning. To keep the system you worked so hard to install gutters on functioning, you must perform regular maintenance. Clear out leaves, twigs, and other debris at least twice a year—typically in the spring and late autumn. If you live in an area with many trees, consider adding gutter guards to prevent clogging. Regularly inspect the hangers and downspouts to ensure nothing has come loose during high winds. By keeping the channels clear, you preserve the structural integrity of your home and avoid the headache of unexpected overflows and potential water damage.
Preventing Ice Dams in Cold Climates
In regions with freezing temperatures, gutters can become a liability if they are not installed correctly. When you install gutters, ensure they have a consistent slope so no water remains trapped. Trapped water can refreeze into ice dams, which back up under the roof shingles and leak into your attic. High-quality downspout extensions help ensure that melted snow is cleared away from the base before it can turn into ice. Proper management of water and snowmelt is the best defense against the cycle of freezing and thawing that often damages roofs in harsh winter climates.
Improving Your Home’s Curb Appeal
Beyond functionality, the aesthetic impact of your home exterior is important. Today’s market offers many colors and styles when you install gutters, allowing you to choose an option that complements your siding and trim. Seamless designs offer a cleaner, more modern look compared to traditional sectional systems. A well-maintained and color-coordinated system not only protects your investment but also boosts your property’s overall curb appeal. When the house looks cared for, it often increases in value. Choose materials and colors that harmonize with your existing architecture to create a polished, professional appearance that stands the test of time.
Choosing Between Professional and DIY Installation
Deciding whether to install gutters yourself or hire a pro depends on your comfort level with ladders and tools. If you have a simple, single-story ranch home with easy roof access, a DIY project is well within reach for most homeowners. However, if your home has a steep roof, is multiple stories high, or requires custom seamless aluminum runs, a professional contractor is often the safer and more reliable choice. They have the specialized “gutter machines” to create custom lengths on-site, providing a result that is nearly impossible to replicate perfectly with standard pre-cut store-bought sections.
Understanding the Economics of Gutter Installation
While there is an initial cost when you install gutters, think of it as a long-term investment. The price of quality materials and tools is a fraction of the cost of repairing a cracked foundation or replacing rotted roof decking. A professional installation might seem expensive upfront, but it often comes with warranties on both materials and labor, providing peace of mind. For the DIYer, the savings are significant, provided the work is done to code. Regardless of the route you choose, a properly functioning system pays for itself by preventing thousands of dollars in potential water-related repairs.
Sustainable Water Management at Home
Modern homeowners are increasingly looking at ways to be environmentally conscious. When you install gutters, you have the opportunity to integrate rain barrels at the downspouts. This allows you to collect and store runoff for garden use during dry spells, which reduces your water bill and supports sustainable living. Redirecting water to specific garden areas through extensions or rain chains is another great way to use your gutter system for more than just protection. By thinking creatively, you can turn a purely utilitarian system into a helpful tool for responsible and eco-friendly home maintenance and water conservation.
Final Summary of Your Installation Project
When you finally install gutters and see the first rainstorm pass, you will have the satisfaction of knowing your home is shielded. This project is a testament to the idea that small, well-executed improvements lead to significant long-term protection. By taking the time to measure, pitch, and seal every section with care, you have effectively managed your property’s greatest enemy: water. Remember that your gutters are a dynamic part of your home’s exterior, and they deserve the same level of care and attention you give to any other major feature of your beloved family residence.
Conclusion and Further Learning
We hope this guide has given you the confidence to manage your home’s water runoff. From the initial layout to the final downspout attachment, every step helps secure your home’s future. For those interested in the history of roofing and architectural water control, you can find more information about these systems and their evolution in home design by visiting Wikipedia’s page on Rain Gutters. Taking this final step into learning more about your home’s components ensures you are always ready for whatever weather comes your way, keeping your living environment dry, safe, and perfectly maintained.
- What is the standard slope for a gutter?
- A slope of 1/4 inch for every 10 feet of gutter length is generally recommended for effective drainage.
- Do I really need a ladder stabilizer?
- Yes, it is highly recommended to protect your gutters from being crushed by the ladder and to provide a wider, safer base.
- How often should I clean my gutters?
- It is best to clean them at least twice a year, though more frequently is advisable if you have many overhanging trees.
- Can I install seamless gutters myself?
- It is very difficult to do so because seamless systems require a specialized machine to extrude the gutter on-site to the exact length of your home.
- Why are my gutters leaking at the seams?
- The sealant has likely degraded; you should clean the area thoroughly and apply a fresh, high-quality outdoor silicone sealant.